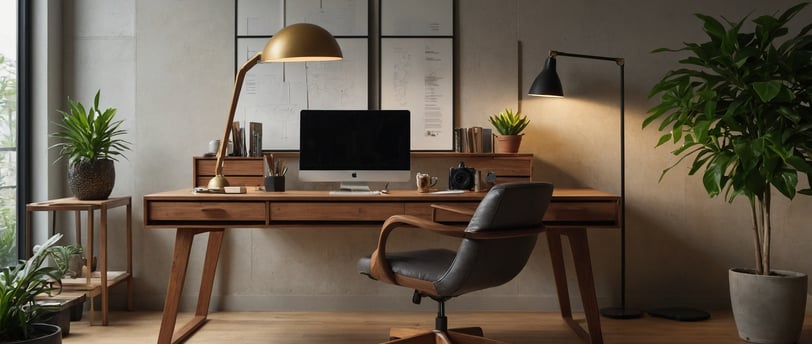

Why Build Your Own Wooden Desk?
Before diving into the details, let’s look at why building your own desk is such a great idea:Before diving into the details, let’s look at why building your own desk is such a great idea:
Customization: The desks may be stylish and beautiful but you can always opt to have it designed to fit the space that you have whether it is a small corner in your house or a complete home office.
Durability: A well constructed wooden desk they will serve you for many years and offer a stable working or studying or a place for a hobby.
Cost-Effective: It is less costly to construct your own desk rather than buying a well finished wooden desk from furniture manufacturing company.
Personal Satisfaction: I often think there is something satisfying in assembling furniture by yourself and I can clearly imagine this satisfaction.
The Equipment and Material You Will Require
The following materials and tools will be required for this project; It will be helpful to know in advance what type of desk you are planning to construct, as the required length and amount of particular material depends on it; nevertheless, here is a list where you can begin.
Materials:
Solid wood or wood veneer (for the tabletop)
2 x 4 inches or 2 x 2 inches lumber (for the legs and frame)
Screws or wood dowels
Wood glue
Sandpaper (various grits)
Stain or paint (optional)
Polyurethane or wax (semi-gloss or high-gloss, matte or satin sheen)
Tools:
Measuring tape
Circular saw or table saw
Drill and drill bits
Screwdriver
Clamps
Sander or sanding block
Carpenter’s square
Step 1: Select the Design and Size
If you want to build your wooden desk then you need to know what type of desk that you want to create as well as how large it is going to be. This depends with the availability of space that you have, needs of work and also the personal preferences that you have.
Standard Desk Dimensions: A standard desk is found at approximately 30 inches in height, 48 to 60 inches in width and 24 inches in depth. Nevertheless, these dimensions depend on the space that you have to allocate for the business.
Style: Traditional designs are sleek with no much carving on the wood, while the contemporary designs can come with a thick wood and a raw finish. For additional storage facilities if required you can also include drawers or shelves.
It may basically be a simple design but the process allows you to get an idea of the general form and shape that the final product will have and possibly influences the decision on the dimensions depending on the actual size of the wood that is to be used.
Step 2: Planing the Surface of the Tabletop and Planing the Frame
Once you have your design in place it is now high time to cut the wood, this will be done as follows. The tabletop is going to be the working part of your desk while the frame – legs and additional supports – will be the foundation.
Cut the Tabletop: If the piece of furniture you are making is from a solid piece of hardwood or plywood then you have to saw it to your preferred size. For instance, you require a width of 60 inches and a depth of 24 inches of the desk then get your wood in those dimensions.
Cut the Legs: Four pieces of 2x4 or 2x2 lumber should be cut to the height of your desk which is, roughly, 30 inches tall. Make sure all the legs are of the same length so that the furniture is level when placed on the devise.
Cut the Support Pieces: Prepare four wooden boards where two will make up the length of the frame and the other two making up the width of the frame. These will be hammered on the legs of the structure and will be holding the whole structure firmly. As a rule, these should measure the same as the tabletop less the thickness of the legs you intend to use.
Master Tip: When cutting make sure that you use a circular saw or table saw; it is also very important to make sure that you have taken your measurements twice to avoid making any mistakes.
Step 3: After that, you will need to construct the desk frame to which the tabletop will be attached later.
Once all of the wood pieces are measured and cut to size it’s time to begin construction of the desk frame. This shall form the base work as you fix the tabletop on the tabletop and guarantee your desk strength.
Attach the Legs to the Frame: First of all, the legs should be installed to the support pieces through the use of wood glue along with screws or wood dowels. This is in order to ensure that the legs are in a 90 degrees angle to the support pieces as recommended by carpenters, by the use of carpenter’s square. Clamps are rather useful in that they can keep all the parts well secured while working on the structure.
Reinforce the Frame: After the legs have been put in place, reinforcement of the structure is done by placing more beams which are placed horizontally. These should be fixed between legs on front and back of the desk to enhance on its stability.
Check for Level: Before we proceed any further make sure the frame is horizontal and in straight line. This will make your desk non-flexible once built to ensure that it does not wobble when in use.
Master Tip: In case you want to avoid the screws being seen from inside of the frame, then it is recommended to use pocket holes.
Step 4: Assembly of tabletop to the frame result in a kid’s table.
As it is now easier to visualize, the frame is now ready and it’s time to fix the tabletop. As a result, this step shall not only join all the components together to form the desk, but shall also add the smooth working surface.
Position the Tabletop: Set the tabletop on the frame correctly which has the mid-point on the legs and the support beams of the frame.
Secure the Tabletop: On the frame side of the tabletop fit screws or wood dowels, which will be used to fasten the tabletop to the frame. Make holes through the support beams without splitting the wood, start by using a drill to make pilot holes. It is recommended that screws should be counter sunk such that at least their head are level with the wooden surface.
Check for Stability: Finally, when the tabletop has been fixed in place you should again shake the desk gently to see if is firm. If the desk swings, then bring more support pieces or tighten the screw of the legs of the desk.
Step 5: Sand and Finish the Desk
Once the desk is set up, the final process is to put a fine finish on the wood so as to make it smooth to touch.
Sand the Desk: Afterwards use a sander or sanding block and sand all surfaces starting with rough texture as to the edges & the corners. Using a piece of sandpaper approximately with the grit range of 80-100, then work your way up with a 220 grit.
Apply Stain or Paint: If you want to, you can stain or paint your desk here because it is an indoor furniture. As mentioned earlier you can use wood stain to enhance the grain or you can simply paint the desk with your preferred color. This is to ensure that it attains an even surface before you proceed to the next step; let it dry thoroughly.
Apply a Clear Finish: To protect the wood from harsh weather and make it appear professional it is advisable to apply a clear polyurethane or wax coat. This will go a long way in avoiding accidents of scratch or spillage on the desk especially if the desk will be frequently used.
Optional Add-Ons: Of course, the main features are drawers and shelves.
If space is a problem then you should add more drawers or shelves to accommodate the excess space that you need. These can be added below the tabletop or on the sides, according to the choice of the design that the manufacturer so desires to include.
Drawers: This one consists of creating a simple box with the sliding tracks that are built beneath the tabletop. Pre-fabricated drawer slides are used so that the drawer will run more smoothly.
Shelves: The crosspieces of the frame can be fastened to the sides or back of the frame to create requested shelves to put such items as books, office facilities, and souvenirs.
Conclusion
Making a wooden desk is an art that is functional and learning how to do it is very important. This seven-part article gives you the novice information required to construct a table that meets your dimensions and requirements for home office, study area, or crafting.
The materials and tools that are required with this type of project are simple and easy to acquire, yet the results are a full-fledged, stunning desk that you can use every day. The best part? The flexible modular design allows maximum adjustability to make it suitable to the client’s design preference and the office space it will be used in. So with the tools now gather and these steps laid out, you can now start making your DIY wooden desk as soon as now.